Our Top Pick for YouTube Creator Creative Suite: Spotter Studio
Why we picked Spotter Studio: After years of grinding out content and wrestling with disconnected tools, Spotter Studio is the game-changer we’ve been dreaming of. It’s an AI-powered brainstorm partner, project planner, and research copilot all rolled into one sleek package. We’ve been using it for our channel, and it’s like having a whole team of data analysts, creative directors, and project managers at our fingertips. The real-time data insights and personalized ideation have helped us create hit videos more consistently than ever before.
Compared to the competition: There are plenty of point solutions out there – TubeBuddy for SEO, Trello for project management, ChatGPT for ideation – but nothing comes close to the seamless integration Spotter Studio offers.
Standout features:
- Labs: A playground for experimental tools that keeps you at the cutting edge of content creation.
- TrendSpotter: Uncovers outlier videos in your niche, giving you a data-driven edge in content planning.
- Brainstorm: AI-powered ideation that feels like jamming with the most creative minds in the industry.
- Pipeline: Streamlines your workflow from idea to publish, perfect for consistent uploaders.
It’s an investment, but considering it replaces multiple tools and potentially a human assistant, we think it’s a steal for serious creators looking to level up. In our experience, the boost in video performance more than pays for the subscription.
Bottom line: If you’re a YouTube creator serious about making content that resonates, performs, and keeps you creatively fulfilled, Spotter Studio is a no-brainer. It’s transformed our creative process, boosted our channel performance, and honestly, made creating fun again. We can’t imagine going back to our old workflow.
Our Top Pick for Vlogging Camera: Sony a6600

Why we picked the a6600: I have owned or used nearly every single model of DSLR/mirrorless camera currently in production. The a6600 is small and light, has a flip-up LCD screen so you can see yourself when vlogging, excellent video quality, near-perfect autofocus, and it’s reasonably priced. The battery is much larger than the previous models and there is no 30 minute video record limit! There really isn’t much more I could even ask for in a vlogging camera.
What they could do to improve: The only thing I’d like to see is 4k 60fps. That’d be nice for some cinematic slow motion stuff at 4k, but you can do it at 1080 and few people will notice.
Compared to the competition: Panasonic makes some cool cameras for vloggers with neat advanced video features, but their autofocus SUCKS. Canon and Nikon have each released their mirrorless cameras now, but frankly they’ve disappointed. The a6500 is nice but doesn’t have the front-facing LCD. There are some excellent full-frame cameras but they are pretty pricey for making a vlog and the lenses are much larger and heavier. Fuji’s cameras are fun to shoot with the aperture ring on the lens, but autofocus in video is still lagging. In my opinion, if you’re using a camera strictly for vlogging, it’s tough to beat the a6600.
Our Top Pick for Vlogging Lens: Sigma 16mm F/1.4
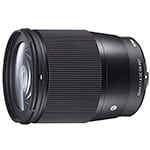
Why we picked it: Generally, I prefer zoom lenses, but for vlogging we usually want to be pretty close to the camera so it feels more personal. For us, the 16mm focal length on a crop sensor camera is perfect. Plus, it’s crazy fast so we can slightly blur out the bookshelf behind our desk in our Youtube videos. We use this lens in 90% of our Youtube videos now.
Compared to the competition: Before we started using this lens, we were using the Sony 18-105. We still use that lens for some outside shots where we need a longer focal length, but it’s rare. It wasn’t fast enough for what we wanted. Sony also makes a 16, but it is way more expensive for arguably no better quality.
Our Top Pick for Lav Microphone: Tascam DR10-L
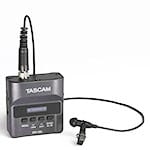
Why we recommend the DR-10L: The stand-out feature of this little lav mic is that it’s not wireless–it’s the recorder itself! So you put the box in your pocket and press record, run the wire under your shirt to clip the mic on your collar, and you’re ready to go! One additional killer feature is that it records two tracks simultaneously at two different gain settings, so if you yell or laugh loudly, you never have audio peaking issues. It’s really innovative. Ricky and Jim use these little recorders in nearly every Youtube video they make. Hear a sample of the audio in this video, for example.
What they could do to improve: The audio signature is a little “tin-cannish”. It doesn’t sound as full as some mics, but it’s not the worst. Overall it sounds very professional, but if you have a golden ear, you’ll notice it.
Compared to the competition: We’ve tried wireless lav mics which have the benefit of inserting the audio straight into the video so it doesn’t have to be synced later, but we just found the connection issues to be a pain. If we don’t use these lav mics, we use the Rode VideoMic Pro+ which is awesome but gathers too much room echo for use in our home offices.
Our Top Pick for Shotgun Microphone: Rode VideoMic Pro+

Why we recommend the VideoMic Pro+: This is a shotgun mic that stays on the top of the camera and transmits the audio right into the video so you don’t have to sync it later. It sounds really nice and full. My favorite feature is the auto on/off feature. When you turn on your camera, it automatically turns on the mic, and when you turn off your camera, the mic also turns off. That seems like a small thing, unless you’ve recorded dozens of videos without remembering to turn on the audio 🙂
What they could do to improve: While the audio sounds REALLY nice and full, it isn’t great for use in a home office because it picks up too much of the echo from the room. You can hear that in this Youtube video where we used this mic. Even getting the mic as close to us as possible, it still sounds a little echoey in the room.
Compared to the competition: This is a really nice shotgun mic. Frankly, you can get some for $40 that will sound 80% as good, but we’re doing everything we can to produce the best quality video we know how, so we sprung for the good stuff 🙂
Note: Do NOT buy this mic on Amazon. There are some fake dealers of these on Amazon and Rode has huge warnings all over their site saying not to buy their gear from Amazon. I’d buy from B&H Photo. We’d love to make another commission by referring you to Amazon, but we care a lot more about YOU.
Our Top Pick for Editing Software: Final Cut Pro X
Why we recommend Final Cut: Final Cut is FAST, inexpensive since you don’t have to pay a monthly subscription and works beautifully for us since we run our whole company on the Mac platform.
What they could do to improve: How about just release more updates? It’s a very slow development cycle.
Compared to the competition: We used to use Adobe Premiere but it’s just gotten SOOOO slow (just like Adobe Lightroom, ahem…). It took us about 3 days of using Final Cut before we were COMPLETELY convinced that it was better for us and we’ve never looked back. Editing software is definitely a matter of personal preference, but this is working great for us. If you want a free option on the mac, iMovie is quite powerful. On the PC, a good free option is Avid Media Composer | First.
Our Top Pick for Budget Lighting: Neewer 480 LED Light Kit II
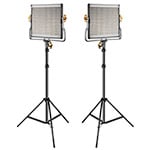
Why we like these: Ricky and Jim have been using soft boxes in their offices for a few years. When they opened the Creator Studio they bought these and have been jealous of them ever since. They are super thin and small so they don’t take up much space in a bag or office, they have great light output, you can warm or cool the light, and can even run on power or batteries. Really nice lights at a reasonable price.
What they could do to improve: Give us some more of them so we don’t have to steal them from the Creator Studio 🙂 We want to replace our other lights.
Our Top Pick for Phone Stabilization: DJI Osmo Pocket 3

Why we like this: We love this thing! It packs up so small and wh We actually used to have a really expensive and giant motorized gimbal for our a6500 camera, but gimbals for the big cameras require a lot of balancing and they end up heavy. It takes too long for our impatient little minds. Then we moved to the DJI Osmo gimbal that uses your phone as the camera. That was great, until this! Just press ON. BOOM! You can walk around like normal and your 4K footage looks silky smooth. It’s awesome!
Check this video clip on our Youtube channel for an example of how good iPhone footage can look when on a gimbal.
What they could do to improve: I’d love it if they could get the price point down. I get it, it’s the gimbal AND the camera. But hey, if you’re budget conscious you can always get the DJI Osmo Mobile 6 and save A LOT. We have one of these and use it a TON. You just have to use your phone as the camera.
Error processing API data.